Showing posts with label sewing. Show all posts

Wednesday, June 15, 2011

How to Make Luggage Tags by StudioCherie

Did I ever have an exhausting, but good day today. I worked at Threads That Bind until mid-afternoon. I spent my day working on cutting 8 tumbler kits from Asian fabrics and waiting on customers. Not boring, but I was on my feet the whole time. Then I had to go shopping and run errands after that. I was pretty tired when I got home!

After dinner I got my second wind and quilted more on the necktie quilt. It is so heavy to maneuver around under the needle. I am just using the walking foot to quilt a 1/4 inch around each tie, but it's still hard to work with. I am not sure I am happy with the quilting thus far, but we'll see how it looks tomorrow. I will definitely be very happy to have this quilt finished and out to its owner, so am going to keep working on it daily for sure!

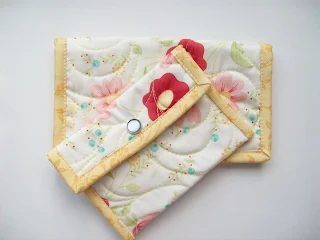
After that I got to work on making some luggage tags. The pattern is by StudioCherie and I am very pleased with it! I started off my prepping all of the peltex that needed to be cut for the 15 tags I need to make. Whenever I have a large project like this I find the most efficient way is to do all of the cutting at once - this way I can have some of the prep done and get right to the fun part quicker during my next work session.
Part of the reason I really like this pattern is because in addition to the full size templates, there are instructions for cutting with your rotary cutter. This made it a simple process to cut all the backs and frames without having to worry about making a template and tracing. It only took a short time to get all of this step done and be ready for the pressing and sewing!

Didn't this one come out cute? (Sorry for the bad night time indoor pictures. I'll try to get tomorrow's project done in the morning and take a nice picture that you can enjoy) The instructions were very clear and easy to follow and included great tips for working with the peltex. I will be adding eyelets to the top, but will probably do all the tags at once to be more efficient. If you would be interested in trying the pattern for yourself you can find it here. I definitely recommend it - two thumbs up!

Pamela

Thursday, April 01, 2010

Frugal Quilting - Binding from Scraps

Have you ever noticed that binding is one of those things that just never comes out even? For every project I complete I almost always have a length of binding left over. Sometimes it's only a few inches, but often it can be much more. For the past year I have been collecting my leftover binding pieces in a shoe box along with other small scraps. My box has recently started to overflow with bits and pieces so I decided it was time to sew the binding scraps together to make a lenght of binding ready for scrap quilts.

I sewed the strips together using a diagonal seam to join the strips and ended up with a very long piece of binding. After pressing all the seams open and making sure my fabric was nice and smooth with a good fold in the center I rolled it all up around a small notebook. This will allow me to place the roll around my wrist as I sew the binding on, keeping it clean and untangled! I think this roll will bind at least two queen size quilts. Pretty good for just using pieces leftover from other projects!

For this set of strips I sewed them together in an "anything goes" kind of a way, but I think I might try saving my bits in a different way next round. I could do a bag of pastels, a bag of earth tones and a bag of brights. That way I would have some more coordinated binding sets. It also might be a nice idea to sew them together as I gather them. Though it did only take me an hour to sew all my bits together and press them. Either way, it's lovely to have some pre-made binding at my disposal for various projects.

Scrappy binding is a great way to save money - to bind a queen size quilt I would buy at least 3/4 of a yard of fabric, so this lenth of binding saved me about $15.00 at current quilt shop prices, and it will look great around the string quilt blocks I am working on. Let me know if you try this - and I'd love to see pictures of quilts with scrappy bindings!


And - my new listing for the day - Pastel Floral Checkbook Cover and Wallet

Have a wonderful Easter weekend. A friend summed it up well. The saddest day ever on earth came 3 days before the happiest one.

Wednesday, March 24, 2010

Wednesday at the Quilt Shop

Today I spent working at my local quilt shop. I checked in some new fabrics, worked on cutting kits and helped customers. I really love seeing the new fabrics that come in, but it's such a temptation. I always want to make something fun out of them, and right now have at least 4 shop samples on my table that I need to get finished! But I was really good today - I only brought home two fat quartes and a small remnant from the end of a bolt.

I already used the two fat quarters - I sandwiched and quilted them, and I cut the finished sandwich into pieces that I will use to make some checkbook covers, wallets and eyeglass cases for my etsy shop. I decided that I will allow myself to choose two fat quarters a week for this purpose. It's great practice for free-motion quilting.

Speaking of which, my machine seemed to be rattling tonight. I hope it was just the little door to the bobbin area not being closed right. Tomorrow I will give my machine a good oiling and cleaning and hope it sounds all right. I usually do all my own maintenace, which is why I choose machines that are fairly simple and don't have a lot of electronics. So far so good, but I have given this machine a lot of use, so I do realize that eventually I will probably need to have it looked at by a professional. I just hope it isn't soon!

Saturday, January 24, 2009

It's a good idea to...

Check your e-mail before you go to bed! I almost didn't, but now am really glad I did because otherwise, I might have missed my day in the spotlight at HandmadeFuzion! So, I ended up staying awake until after midnight because then I just had to add a few more listings that I have been meaning to get done, and double check my listings for typos (which I probably missed anyway because it was after midnight!)

I have to say nice things about Handmade Fuzion because even though I haven't had any sales there yet, I think it is an awesome site to buy and sell handmade. It is juried, so you know that the product you get will indeed by handmade by the artist - which is the point of buying handmade, right? The administrators of the site are awesome, prompt replies to questions, and they added a special subcategory in the quilt section just for me! Isn't that great? I was very happy! I am excited to be included on the website, and hope for great things for it - it's very exciting to get in on the ground floor of a new venture and I can't wait to see how it goes.


My current project is a sample for the shop (we are getting ready for Quilt Run 101 which means lots of new samples and things to catch the eye of all those quilters!). Here are a couple of very bad pictures. Which you will see a lot of in the near future because the rain is back on the Oregon Coast. That high pressure system that was giving us glorious weather has moved on, but we need the rain, so no complaining!


The fabric in this quilt is Natural Garden by Holly Taylor, and for some reason it has not sparked a lot of interest, yet. We are hoping a sample will show everyone how lovely this line is and will help sell the remaining jelly rolls we have. I love the rich reds in this, and added a similar red as a narrow inner border, then the brown with green birds as the outer border. I got it basted yesterday, and halfway quilted! I am quilting it with a soft green on the top and off-white on the back. I'm simply doing a large meander to get it done quick, most of the samples do quite well with a simple desing, but for my own quilts I like to go a little crazy and quilt them more.
This picture also shows how messy my sewing room is at this moment. Yes, I did start cleaning then I started sewing and accumulating new projects. Time to start spending more time in the sewing room actually sewing, instead of time in the sewing room on the internet! I also need to finish a lot of half done projects, and get rid of a lot of extraneous stuff. I think you will be seeing some e-bay auctions coming up for some books and magazines, and who knows what I will do with all the extra fabric! Yes, I have my work cut out for me, but when I put my mind to it, I can really accomplish a lot in a short time. Time to put my mind (and body!) to it!

Tuesday, October 07, 2008

Complete Joy!


Nothing like finishing a project to put a smile on my face. Especially one that has languished in a pile for far too long a time. Many months ago I took an oriental panel and some coordinating fat quartes intending to create a small wall hanging to showcase the panel. I also purchased a ruler and a book on Piping hot Binding to go with this project. I got the fan blocks for the corners paper pieced some time ago, but since then it's just been sitting.


I was asked to do a demonstration on piping at the quilt show, so I decided to use this project as my demonstration piece (since I have never actually made a quilt with piping on it!). I used narrow piping around the panel, and the edges of the fans. I finished the top last week, and as I have a sample at the shop that's ready to go home, decided to quilt this one and bring it in so I can have the other one! I just did some stitch in the ditch in the seams, and did some free-motion to outline the details in the panel. I think I'm going to add a few gold beads for stars in the sky tonight, and I will take it in tomorrow.


So, in celebration of finishing a project I've been working on the quilt I am making for my bed. Some of those Midas touch fabrics are pretty wild, so we'll have to see how this one comes out! I've change my idea of how I want to put the stars together several times, and have returned to my original scrappy star idea! Some quilts just have a mind of their own (and some quilters are loosing theirs!).

Tuesday, September 09, 2008

Messy or Creative?

Looks lovely, doesn't it? Excuse my mess, and actually this is the cleaned up version of the mess! I don't know if I could even function in a fully clean and organized situation, but it is one of those things I might like to try someday!

This is my cutting table. It is covered with things that I need to work on this week. My plan for the day is to sew my way through these piles and have them gone by evening. Then I will organize the left-over piles and deal with them, leaving a clear space to do some quilting work on for the rest of the week. I really need to do something with that overflowing box of fabric that was given to me that is resting on the floor also! At least the garbage bin has been emptied recently!
Ironing board, and notions area. Not too bad, I worked on that over the weekend. There is a stack of magazines on the dresser that needs to be sorted and put away, or at least moved to another area! The balloon sculpture is from a clown that I recently did some sewing for. I suppose I ought to take a picture of it and then give it to someone. It is already starting to get floppy and not as cute as it was! In the back corner is my strip bucket which is absolutely overflowing. Time to start some string blocks to make some more quilts from.
Posted by Picasa
My sewing table, which looks much better than it did earlier this week. I have found some fabric to finish the quilt hanging on the wall, so want to work on that. I even have some backing fabric for it, so it is ready to work on. Also there is a stack of t-shirts that I really need to work on finishing for a t-shirt quilt. I have about half of them fused, but it's such tedious work I have a hard time pushing myself to get it done! Right next to the machine is fabric I bought to make some placemats and napkins that I want to get done this week also. So, as you can tell I don't have a lack of projects to work on, just a lack of initiative to get them done! That's why I did all my shopping yesterday, and planned menus for the week, so I can actually get a ton of sewing done this week and break out of the doldrums. Wish me luck!

Tuesday, May 20, 2008

Fun with Amy Butler


I must say that I officially love Amy Butlers patterns! They really are wonderful. I finished the Weekenter Travel bag last week, and while there were some difficult bits, the bag is fabulous. I have to say that I do not like working with the stiff stuff in between (peltex, timtex). Not good on the fingernails, especially when you are trying to sew cording onto it around a curve with another layer of interfacing and fabric to shape the corners of the bag - you get the idea, I'm sure! But the bag came out beautifully, and I know my client will be very happy with it. And I did a fabulous job of matching up the pockets and the sides of the bag.


My next Amy Butler project will be the laptop cover - Sharan got a free sample at Quilt Market last weekend, so I'll be excited to work on it next! Plus I found a site with some free patterns! I cannot wait to get started making some of these great things - they will make great gifts!


What am I sewing today? I have a wedding dress to hem and bustle, and another 16 blocks to machine quilt for a quilt I'm trying to finish up this week. Won't be able to put pictures up on this one till later, but it's really a neat quilt. Not too much fun to quilt - it has a lot of embellishment - feathers, buttons, ribbon. It has 56 blocks with 1" sashing in between, so I stitched in the ditch all the blocks over the weekend (about 3 hours worth of sewing) and am now outline stitching the blocks. If I do about 14 a day I will finish it up on Thursday, and be able to pass it on to the binding person.


What I really need to do is work on the Round Robin, and the Row Robins that are all due in about 16 days!!! Yikes! Deadlines get me motivated, but this one is getting way too close for comfort! Time to get sewing - so hopefully I can get everthing finished on time!

Tuesday, May 06, 2008

A Quick and Easy Quilt Label

I thought I would share a nice looking quilt label that doesn't take a lot of time or work to make. All you need is a square of light fabric to write on, 4-6 inches square, a piece of freezer paper to iron on the back of this, and a few 1" strips to frame your border.

Iron the freezer paper to the back of your light fabric. Then write your label. (I like to use an oversized piece because sometimes I make a mistake and this way I can just flip it over and use the other end to write on!). Write your label with a permanent pen. Pigma markers are awesome, but what I really like to use is a gel pen. They come in so many colors and add a custom touch to your label.

What information to put on your label? The name of the quilt. Your name. The name of the person who quilted it, if not yourself. The date. (I usually just use month and year) I like to add my location. If you are sending it out to shows, it is a good idea to put all contact information on the label. If it is a gift, put the recipient's name and occasion. As you can see, there is a great deal that you can put on the label, so you may want to make it a nice large one! Another great tip is to write the measurements of the quilt. That way you don't have to remeasure it beacause you forgot how big it actually is!

After you have finished writing your label, remove the freezer paper and press the label. Trim to a square, I like to trim about 1/2" outside of the writing to make the label as small as possible (less sewing to do!). Add a 1" strip to each side, press seam allowance toward strip, trim even with top and bottom. Then add a 1" strip to the top and the bottom, press seam allowance toward strips and trim even with sides. Press 1/4 inch under all around this sewn block, then pin to back of quilt and applique down.

See how easy it is to make a cute label for your quilt?  I hope you do label the quilts you make.  Someday, someone will want to know who made it and why, and this might be their only clue!

Have a quilty day!

Thursday, April 24, 2008

Don't Forget the Label

This is one of the things that I have a problem with - the added step of adding a label to my quilts. I hate to think of how often I have completed a quilt, then not added this needed information to the back. One of the things that really helps me is to use one of the pre-printed labels that are available to purchase. A 1/2 yard panel gives you a large assortment of attractive labels to adorn your quilt with very little work. The only other thing you need is a permanent archival quality writing pen and a needle and thread to attach it.

A really clever person could think about it ahead of time and actually piece it into the back of the quilt, but I am not that clever, mine are usually just hand appliqued on the lower right corner of the back of the quilt. every once in a while I do get a little clever and add the label before the binding, so I only have to hand sew two sides!!


One hint to make it easier to write on the label is to iron freezer paper onto the back of it. This makes it a little more stable and easy to write on. I like to practice what I want to write on a piece of paper the size of my label, just to make sure everything fits and looks nice. I like to use a pigma pen, or sometimes a medium point gel pen (and I like to use colors!). The minimum information I add is my name, the date, my city, and the name of the quilt. If I'm making a gift label I put the name of the recipient, and the giver if it's been purchased for someone else. I've been known to add a poem, or quotation, or a bible verse, each of these things makes the quilt more personal.
After writing on the label, I attach it to the quilt with pins, trying to get it fairly straight (not always my strong point!). I stitch it down using an applique stitch.


I don't know why it's so hard to do this, it hardly takes any longer than it's taken me to type this post, but it's a very important part of quiltmaking. After all someday, somebody will want to know who made this quilt and why, and what was she thinking when whe used that color of purple?

Wednesday, April 23, 2008

A Quilt for Asher

One of the fun things I've done lately is to make a sweet baby quilt for my grandson. Having no experience in making boys things, I am having a wonderful time looking at fabrics in a new way. The inspiration for this quilt was the tractor fabric. Definitely a boy fabric! The first fabric I chose to go with it was the mustardy yellow. I liked how it brought out the color in the tractors. Then I started looking at blacks, greys, and other greens.
One of my favorite fabrics in this quilt is the ruler/tape measure fabric. I had thought of this fabric in terms of being feminine because of my connotation of it being a sewing tool. That is, until the day a little boy in the quilt shop showed me another point of view! He thought of it as a tool like the ones in the hardware store, and he loved the numbers on it, showing off his ability to count. So, of course that one was included.

That got me going, so I found some rocks that were gray, a black and white check (racecars!), and some nice green trees. Then a beautiful bright orange with quilt blocks on it because after all this is from his quilt obsessed Grammy! One more nice green, and a quarter yard of fabric that looks like grass for the border and I had the top ready to go.


An adorable flannel with tigers on it in the perfect shade of gold makes an awesome back for this quilt. I put a poly battting in it, because I want this to be a drag around blanket, and machine quited it to make it nice and sturdy. I hope Asher enjoys his quilt as much as I enjoyed picturing him snuggling in it while sewing!

Tuesday, April 22, 2008

Do the Bustle!

Yes, I am a product of the 70's! Couldn't resist this title, because I wanted to share about my newest skill - bustling wedding gowns! In the past I have always avoided the issue of bustling wedding gowns by adding a wrist loop to the train, but this train was so long that this approach really wasn't going to work at all.

So, thanks to my good friend Google I found several great resources for instructions and ideas for bustling wedding gowns. I learned the difference between a french bustle and an american bustle. I learned all about pick-ups, loops, ties, hooks and rings. Definitely an evening well spent because now I am confident enough to take on any gown that needs a bustle!


This gown called out for a french bustle (which is a bustle that is attached insided the gown. After some experimenting with pins I decided the best intervals to attach the ties, and got busy with a needle and thread and some grosgrain ribbon. I then marked all the sets of ties to make it a little easier on the wedding day to get it all tied up nice and neat!
I ended up with a couple of different options for the ties, this one is with the outer ties tied to the center of the gown, which I think showed off the pretty embrodery and beading on the train the best.
This one is with the lower section tied to the sides.


I am excited that the next time I am asked if I can do a bustle I will not hesitate to say "Yes, I can!"

Besides wedding dresses, most of my sewing lately has been hemming and altering prom dresses. The prom is Saturday, so I think I'm about done with that, I am so ready for some quilting! I have finished a few things, but I'll save that for another day, got to have something to write about, you know!

Thursday, March 20, 2008

Journeying on with Dear Jane


I got my Dear Jane tote out today and finished a side triangle. This one was really tricky - I used a combination of hand piecing, paper piecing, machine piecing, and applique! I'm really glad I decided to do the side triangles as I do the blocks, it's a nice change of pace. I tried to organize all the stuff in my tote, but I don't know as I was very successful. I don't do organized very well!
Ideally I would like to use a different fabric for each block, but I have already duplicated a couple of fabrics. I go through my fabrics and think that I already used them, but when I check, I find that I haven't. I suppose if I was working at it more regularly I would remember better!
Tomorrow's adventure in sewing will be making a boat cover out of tyvek! It sounds like the guy I'm doing this for has a few more lined up for me also - we'll see how it goes. If it's an ordeal I won't do any more, but if it goes well I could be busy over the summer, there are lots of boats here on the coast!

Wednesday, August 15, 2007

Doing The Work

Last week I was pretty excited about the opportunity that presented itself - this week I am in the middle of the reality of making all those bags! Believe me, it's not free money, I will have earned that paycheck when I am finished, and while I do love sewing and creating, I also get tired and would rather play than work - just like any other human being. Not to mention I have a stack of quilts that I'd really rather work on!


I have all the outside panels cut and sewn for the bags, so right now I am working on constructing the bag bodies with lining. I am binding the seams of the bag because it's a nicer finish than just zig-zag stitching them. I have 7 of these done, so I have to do 9 more, then I'll make all the handles and attach them to the top of the bag. At that point they will be ready for the lining strip that goes on the top, a little top stitching and the bags will be done. I am also making matching tags, so those will need to be done also. I have to go get some grosgrain ribbon for those. I have made each tag different, to match it's bag as much as possible. These will make really nice gifts, I think


I also have a home project today. I bought my husband two 6 foot bookshelves from Staples yesterday and have to put those together today so he can get going on moving his music stuff to the upstairs room. He is really having a time with it because he likes to know how everything is going to fit and look before he gets it done. I keep telling him to think of it as a work in progress and he can always move things around later if he doesn't like it the first time around! So far I haven't had to do too much of the moving stuff (hurray!), but when he gets ready to move the stereo equipment I will probably be called into service. It's fun to see him excited about having his own space. I remember how thrilled I was two years ago when I got to have my own sewing space. I rearrange my room quite often, still haven't found the perfect arrangement, but it doesn't bother me so much. I got an area rug for my floor and it is fantastic - lot's nicer to stand on that the old linoleum that is in there, and really lightens up the room a lot.

Pamela - getting busy on those bags!

Friday, August 10, 2007

You Never Know

One of the great things about life is that when you wake up in the morning you just never know what that day will bring - when you think about that it's pretty exciting! What yesterday brought for me is an opportunity to make 20 patchwork tote bags - and as luck would have it I only have to do one day at the quit shop next week, so it was perfect timing. I just finished 2 big sewing projects so I'm on a roll anyway. I got about half of the piecing done last night and if I have time will do some more tonight, then on to actual bag construction. I am really pleased to get to use up the rest of the fabric I had from the sample books, though I was thinking of asking if she has anymore now! The tote bags come out so cute - I know my friends have really enjoyed the ones I have made for them.

The nice thing is I will be able to get my rainy day fund back up a bit, I had depleted it for my vacation. Who knows, if I can get ahead enough maybe I can take another trip next summer! I am really happy, and can't wait to see what today brings - it may not be as exciting as yesterday, but I know God has a blessing in store for me in some small way - He always does!

Monday, August 06, 2007

A Pretty Toile Slipcover

Delivered the slipcover today, any my client loved it. It really is pretty, and I bought the remaining 2 yards of toile from her, so I'll have to make something for my Etsy shop from it! I had forgotten how tedious a slipcover for a wing chair is to make. Funny thing is that I had 2 other people call me about slipcovers this spring, but nothing ever came from either one of them. Wonder if they're waiting for fall to come?


>


I started quilting on the commissioned quilt I've been working on. I'm doing spirals all over it. I'll bet I'm going to have to buy another spool of thread because I'll run out with one side border left to go - isn't that how it always works out! I quilted for about 2 hours this weekend, and my shoulders and neck are definitely tight. I forgot that I had lowered my chair so I could see to piece all the points more accurately and ended up quilting that way for about an hour. What a difference that few inches make for me. Hopefully I'll be able to finish up the quilt tomorrow if I take enough breaks and stretch.


This is part of the quilt stretched out on the table while I was basting itThe blocks are all 9 inches and both blocks required piecing in a square in a square fashion. If I was designing the quit I would have made it as blocks with pieced sashing. Probably a little trickier to make sure all the sashings go on correctly, but the blocks would have been a piece of cake to piece!

This is the quilting design. I've got a really pretty King Tut thread to use for the quilting. It echoses the colors in the batik with the leaf design. I thought a curvy quilting design would be nice because there are so many straight lines in the piecing.

I'm going to have to trim about an inch off of both sides because my border wasn't as wide as my quilt top, I think I made an error in my calculations because I was making the quilt larger than the pattern called for. I probably added too much to the borders. The binding will be the darkest blue in the corners of the star block. It's a queen sized quilt, should be about 88 x 102.