Showing posts with label #christmasinjulyib. Show all posts

Wednesday, July 13, 2016

Christmas In July - Island Batik Ambassador Challenge

I've sure had a good time this week working with the Holiday Happenings line!

  It's a fun mix of traditional Christmas colors and outdoorsy prints.  The second border I made from the fat quarter of an animal print.  So perfect for anyone who likes the outdoors - bears, rams, fish bears, elk...all on a lovely tonal green, red, purple, gold background.  Absolutely beautiful!  I added a pretty neutral print with swirls on pine needles for the cornerstones.  For the third border I did a narrow gold strip.  Then I was ready for the final pieced border.


When I started I wasn't sure whether I was going to go with the red triangles pointing out or in.  I liked them turned out the best.  Then I fussy cut four more of those great reindeer for the corners.  Here is where one of my favorite things about batiks came in really handy!  All the reindeer were leaping in the same direction on the fabric, but I could use the reverse side with no problem so that I could have them leaping in toward the center on both sides of the quilt.  


At this point I felt that my quilt was complete so layered in and quilted it - I decided to use an overall swirl and hook design with red thread.  I was really happy with the results.  My June challenge had so much detailed quilting that it was really fun to make a quilt with an overall design - and it was quick!


The swirly design really goes well with the swirls in the background of the reindeer fabric!  I finished it up with a binding in the swirly pine needle fabric.  As always, it's a pleasure to work with the beautiful fabrics that Island Batik provides me as an Island Batik Ambassador!  It really is an honor to work with their company and I appreciate their generosity in providing me with such delightful material to sew with.

I love my finished quilt!  I've been wracking my brain to come up with a name for it, but so far I've come up lacking - I'd love a suggestion if you have one.  Thanks for following along on my journey of making my Christmas in July Challenge!


Saturday, July 09, 2016

Chistmas in July Border One

I added the first border to my Christmas in July project  This is the Points Out border in EQ7.  I thought it was perfect for my quilt - I like the way it echos the star point triangles.  I wanted to introduce one of the lighter fabrics in my fat quarter bundle, and I think it sets off the center very nicely.

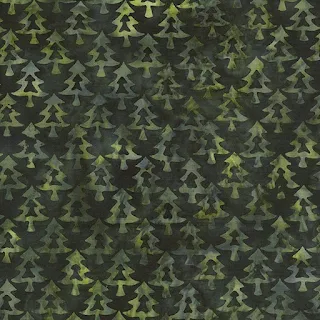
The second fabric I used is the Christmas tree fabric.  This is a fabric I could see myself using a lot - it's not strictly a Christmas fabric, just a nice pine tree design that would works in lots of projects!
Since it is directional I had to think about the cutting for this one!  It worked out perfectly because I used the same method for cutting the triangles as in the Ohio Star block.  It takes two 5 1/4 inch squares cut in half diagonally so I just had to makes sure to keep the triangles sorted correctly.  It's a little tricky sewing the triangles to each other because you have to offset them just right, but if you put a pin through the seam line at the corners it's easy to match them up just right.

I used this fabric for the corners - another favorite:

I'm having a great time designing as I go with this project!  I'll probably add another 2 or three borders, then call it done.  Tomorrow, I will show you  how I use EQ7 to design a medallion style quilt - this is a fun way to make a quilt that isn't just blocks and sashings.  Plus I have some tips on making sure your units are a size that is easy to cut.

Friday, July 08, 2016

How to Cut and Sew an Ohio Star Quilt Block

I wanted to make a smaller quilt for the July Island Batik Ambassador Challenge.  I picked out a pattern and decided the fabrics, but when I was at that point happened to see a pretty medallion quilt and thought to myself  "that would be fun!"  Uh-oh!  The idea stuck, so I decided to start out with a center block featuring this adorable reindeer fabric and see how far I get through the month.  Luckily I have EQ7 to help me with the border options, and when I run out of fabric, or decide I've had enough I'll finish the quilt up!

One of my favorite blocks is the Ohio Star, so I decided to make this my block center.  I've made several quilts featuring this block:

This mini sampler quilt has three of them.

The Crown of Thorns block is a variation of Ohio Star.

Here is a mini version with sashing and curved edges.

And this one, set on point is a block of the month quilt I won at a guild meeting many years ago!  As you can see, this is a versatile block and can be used in a variety of ways.  The history of this block dates back to the Civil war, when block quilts began to be popular.  The name came later, and though it goes by some other names Ohio Star seems to be the most popular.

This is a Nine patch block and is made from only 2 units.  4 squares made of quarter square triangles and 5 plain squares.  I chose a three color variation for my Christmas in July quilt.  I wanted to show you how to make this block, so picked some fabrics from my earlier Island Batik boxes to make this sample block in blue.  To make an Ohio Star block you will need:
  • One center square 4 1/2 x 4 1/2 inches.  (I fussy cut my Christmas in July version!)
  • Four corner squares 4 1/2 x 4 1/2 (background fabric)
  • One 5 1/4 inch square background fabric cut in half diagonally both ways
  • Two 5 1/4 inch squares star point fabric cut in half diagonally both ways
  • One 5 1/4 inch square accent fabric cut in half diagonally both ways

To make the star points, sew the star point triangles to the background and accent triangles to make half square triangle units.

 Make sure you sew with the star point triangles all on the same side - this way they will be opposite each other when you sew the half square triangles together!  Press toward the dark fabric.  Sew the pairs together, matching the center seam. Press this last seam as desired.

 Trim block down to 4 1/2", make sure to center the block and that the seams go from corner to corner!


Lay out your block - background squares on the outer corners, fussy cut square in the center and accent triangles facing the center square.  Sew together, making sure you match your triangles at the corners of the center block.  Now I'll show you my finished center for Christmas In July:


I just love this reindeer print!  I definitely want to add a few more of these to my quilt somewhere...we'll see where I end up going with this.  I'll be posting on Sunday showing how I am designing this in EQ7 - I think it's going to be a nice little wall hanging when I am done.