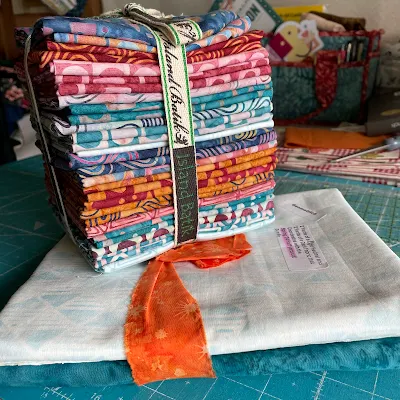
This month's Island Batik Ambassador was an interesting one - we were tasked with creating a project using the applique technique used in the Full Bloom quilt by 4th and 6th design. This is a great project to highlight the beautiful Aurifil thread and new fabrics we received in our Ambassador boxes!
Truthfully, I don't typically enjoy applique, I'm more of a piecer, but I am always game to learn something new, so I gathered all the things I would need to try out this technique. I watched a video, and it seemed pretty simple, so I was encouraged to jump in with both feet!
I received the lovely Geometrica collection designed by Jerry Khiev - love the colors and the fun geometric designs! (You can purchase this at Mill End Store and Creekside Quilts here in Oregon!) It was fun to lay them all out and start dreaming about how to put my quilt together.
I used some flowers and a butterfly from EQ8 - there were so many choices! I really love how easy it is to make the blocks the size you want them to be. I made most of my blocks 12 inches, but did make one flower larger at 18 inches.
It was a little tricky to remember to put the freezer paper on the right side of my fabric! Luckily, with batik it often doesn't matter much which side you use! After ironing the templates on and cutting them out the next step is to use glue to attach your templates to the background. This was a little sticky at times, but worked great to secure the pieces. So far so good!
After everything is ironed and glued down, it's time to choose thread!
Aurifil provided me with some nice choices that worked so well with my fabrics! These small spools are so great for a project like this!
I used a size 12 Schmetz Microtex needle, and it worked perfectly! No sticking or shredding at all!
See how nicely the stitching accentuated the edges of the pieces? It's super simple to go back and forth, building up a nice layer of thread for the outline. It doesn't matter if you get a little messy - and it looks great! The stabalizer on the back keeps puckering at a minimum. For my machine, I found that using my normal straight stitch foot worked best - I did get more puckering when using my free motion foot when I tried it. I think the thick stitching almost looks like a narrow cord around the pieces.
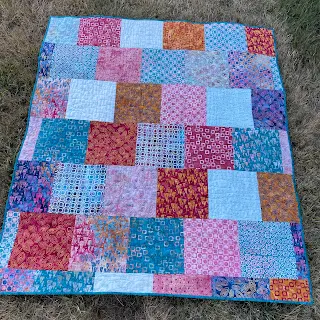
After finishing my blocks, I set to work cutting out 6 inch squares to add to my design and bring it up to a lap size.
I thought it was pretty, but it needed a border to pull it all together.
The
Oliso iron I received was perfect to use with the
Fusible batting by Hobbs! Nice and hot so it gets everything fused the first time! This batting is definitely a favorite of mine - it's so nice to not have to baste with pins.
For the quilting I did wavy lines with my walking foot across the width of the quilt. I like how it doesn't stand out, even using the 40 weight teal thread from Aurifil!
For the back I used squares of the fabric - so it's a two sided quilt!
Here's a good shot so you can see the stitching - so pretty! I love this method of raw edge applique and will definitely use it again. Glue basting was a neat technique to discover, and I hear it works great for attaching binding as well. The tear away stabilizer really improved the look of the applique as well and kept it from puckering. So, I learned a lot from this challenge and discovered some great products that I'll use again in the future. And I made a lovely quilt!


6 comments:
I love your quilt Pamela.
So pretty!!!!
Beautiful quilt--love the blues!!
Looks awesome! Love the flowers, and that fabric is beautiful.
So pretty. I really love the simple wavy line quilting. Have a great day!
It sure turned out lovely!
Post a Comment