I am happy to say that I have finished up my April Challenge already, and that is no April Fools joke!
Of course, you won't be reading this until after April 1, but truly I did finish my project up on Saturday. I really enjoyed this Island Batik Ambassador challenge - I had forgotten how much fun working with the specialty stitches was.
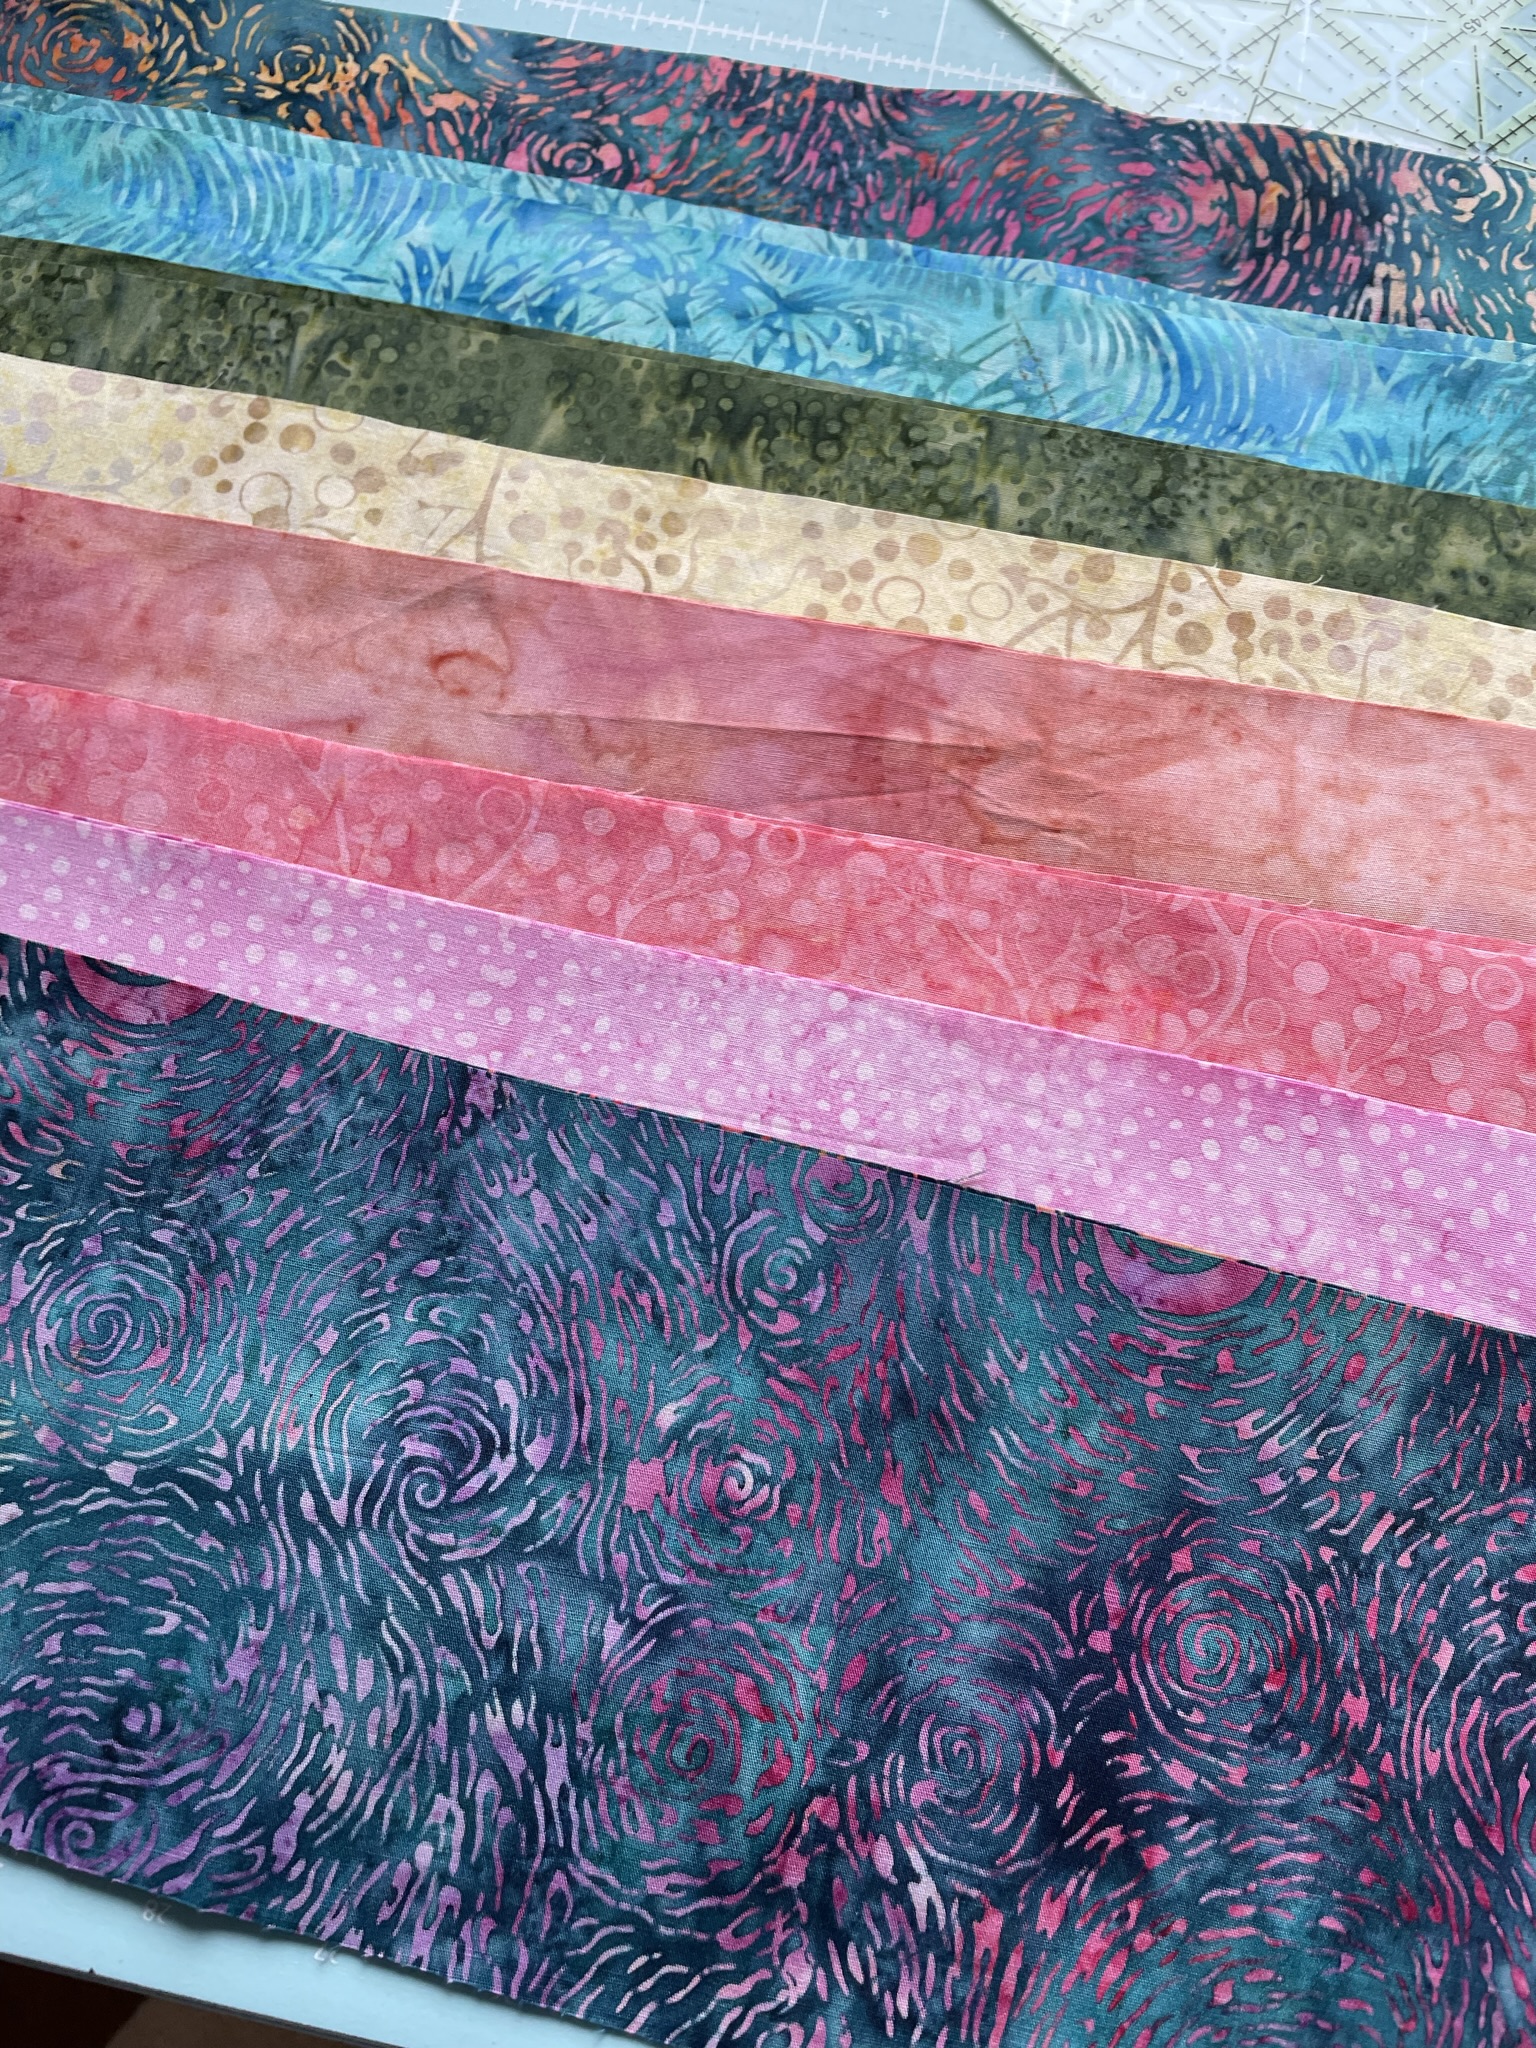
For my challenge I used two of the Stash builder rolls I received in my Ambassador box in June along with the Aurifil Color Builder collection that was included. This is the Frangipani collection. Very soft and neutral. It was interesting to decide on how to use these for this challenge, as they really are very suble and soft. I added this dot in Tin for the backing of my project, which I decided would be a quilted journal cover.
I almost went with a more neutral palette but decided that some pretty colors would be fun to work with. I looked through the rolls I received and these two called out to me. I thought that the pretty colors would be enhanced by some neutral colored threads.
I unwrapped the rolls and got them pressed. I also got out my little Brother sewing machine that I use when I need to zig-zag or do specialty stitches. This little machine has been quite the work horse. And it has a pretty good selection of stitches for embellishing my projects! While I love my Juki TL 2000qi for piecing and quilting, sometimes I do need a bigger variety of stitches, like today!
I had two strips of that lovely dark teal with pink and orange! Such a pretty fabric - unfortunately I don't know what it is. The stashbuilder rolls are made with the leftovers from making the Island Batik pre-cuts and they can be from a variety of older lines. But I'm sure glad to have these two lovely strips to play with! Along with some nice pinks and peaches, an aqua, dark green and pale golden yellow. Yes, these will play together very well!
I prepared my backing and batting (a scrap of
Hobbs 80/20 cotton), then got my center square cut. It's traditional in Crazy Quilting to make a 5 sided piece for the center. Since this is my favorite fabric, I thought it would be a great start!
I started with a pink. I stitched the strip I cut to my center piece, then turned it and pressed it. Time for the fun part, choosing which stitch to use!
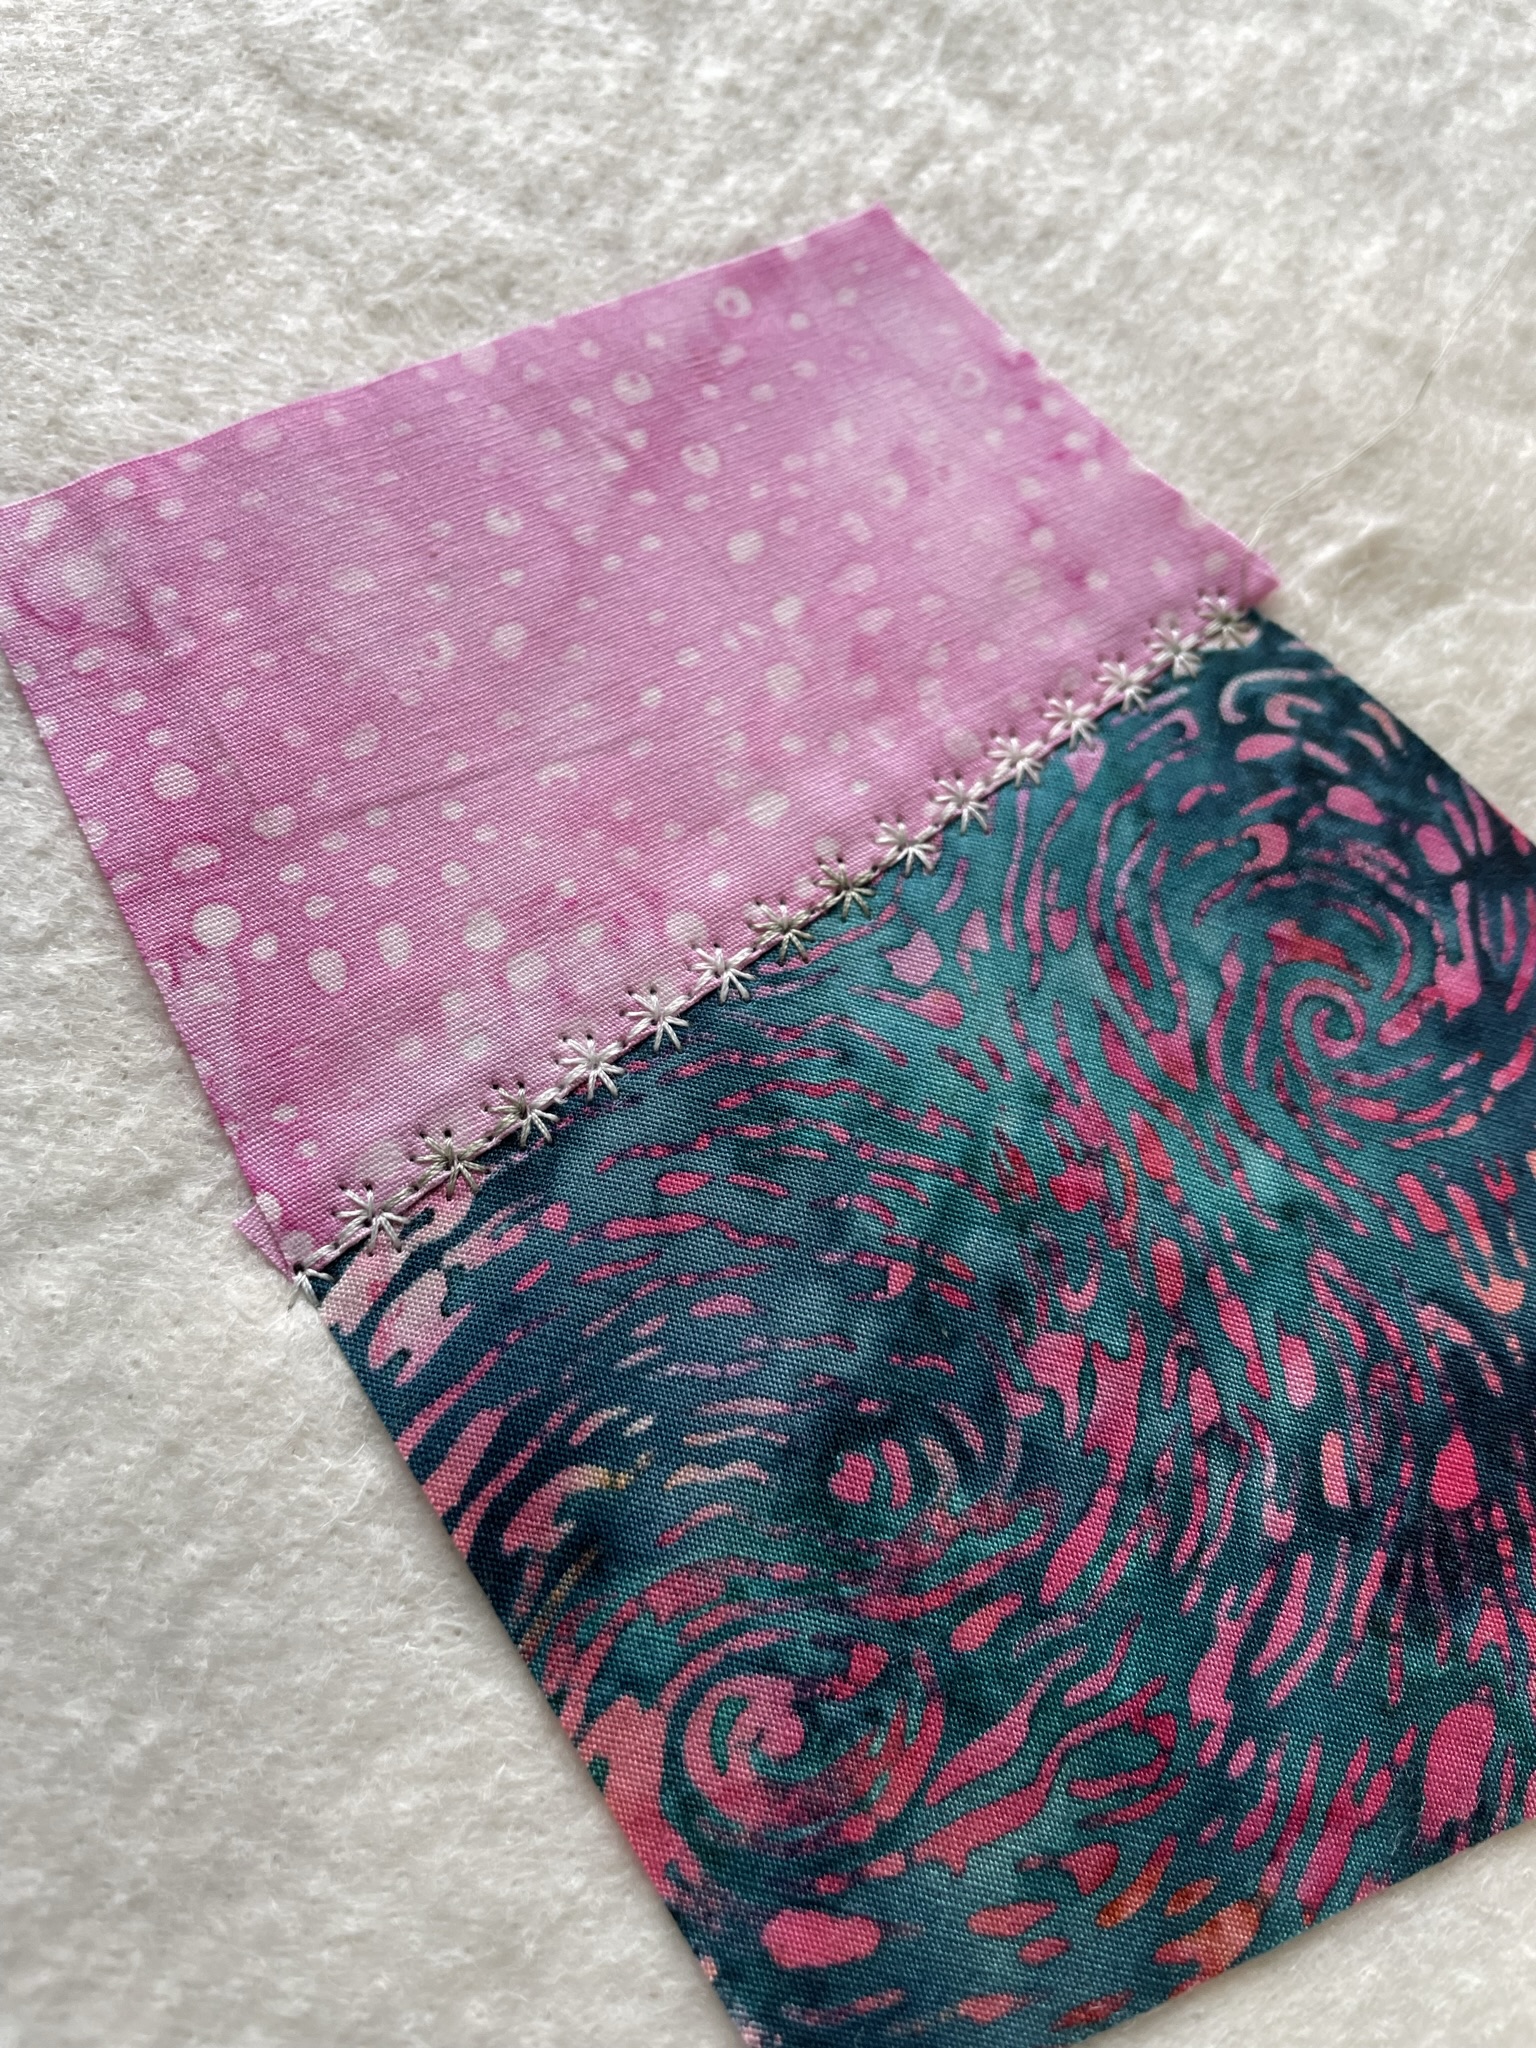
One of my favorites - it looks like a line of asterisks. Can you see the subtle color change? I used the lighter variegated for this one - Silver Moon.
You can see the color a little better with this stitch. Still subtle, but I like it! Time to change threads and see what the next one looks like. It's a little darker.

Still pretty subtle, but I like the soft look with these fabrics. It looks nice without being overwhelming. I like the leaf stitch, too! I keep cutting strips and sewing them on. I enjoyed trying out the darker variegated, Silver Fox. You can see it in the alternating bars below the yellow fabric.
Doesn't this look nice? I think it almost looks like lace, which gives this a pretty and feminine look. The solid thread in the collection is 2800 - mint ice. You can see it in the scallops on the dark green. Now that the front is all pieced, I decide to use up and down strips to fill in the back. This way I can sew all the strips, then do all the embellishing at once instead of having to keep changing stitches and thread.
When you look at the whole piece, the stitching shows up nicely, so I am pleased with the results! Now that the Crazy Quilting is done, I can assemble my Journal Cover.
I think it's very pretty! I used that nice teal print for the bindings and the inner flaps. I found a matching piece of aqua ribbon for the book mark. If you would like to make a journal cover of your own, my pattern is available on
Etsy!
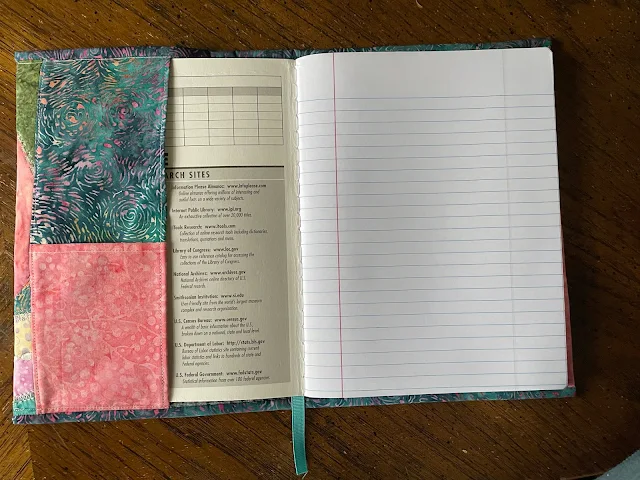
The rosy pink makes a great pocket!
I love using Aurifil thread for decorative stitching. It has a nice sheen and stitches very nicely. Since I was stitching through batting and a backing I didn't need to use any stabilizer to achieve good stitches. I used over one bobbin's worth of thread doing all of this stitching and had no issues at all with it! I used a size
14 Schmetz topstitch needle from the Costume Combo pack in my Ambassador box and it did a great job of going through the layers cleanly. This combo pack has a great assortment of needles, so handy!
Have you tried out the decorative stitches on your machine? You might be surprised at how much a little stitching can add to your project! You could even use some of these to stitch your binding down. I thought about it, but ended up topstitching like usual - but I did use the variegated, which looks nice, too!
I hope your month is off to a good start as well!


6 comments:
Your crazy quilted notebook looks fantastic. I love all of the fabrics, colours and stitches that you have chosen.
I'm yet to make a start on my project, as I've never made a crazy quilt project, so thank you for your step by step pictures.
Pamela, your journal cover is sooo pretty. I really love the colors you used. I love the stitches you used also. I have a lot of these on my machine and have used them quite often. They do make your project look so cute.
What a great idea! Beautiful cover! Love my Brother for the stitch selection too 😁
I left comment above. Pink Tulip Quilting 😁
Love the stitches you used, they don't overwhelm your pieces at all. Great project!
Pamela, I love this!
Post a Comment