

I was excited to come home from vacation this month because I knew that I had a fun project to look forward to - the October Island Batik Ambassador Challenge! It's always fun to get one of the ByAnnie patterns with all the supplies plus fabric from Island Batik. We got to choose our pattern and fabric - I picked the A Place for Everything 2 pattern and fabric from the Paisley Got Mod collection designed by Kate Colloran - so fun! I love the different patterns that ByAnnie has - they always come out so nice and professional looking!

Here is the fabric for the outside of my bag - isn't it fun? I'm a sucker for paisley designs! Love the raspberry with the bright yellow/green, so cheery!

The soft yellow was my choice for the lining of the bag. This bag features a ton of pockets, some are clear vinyl, and some are mesh. Since there are lots of pockets, there was lots of cutting to do. I love that the ByAnnie patterns help keep you organized with a sheet of tags to put on all your pieces. I always print a copy so I can cut that up for labeling my pieces.

After the first part of cutting is done, it's time to quilt the panels for the main pieces of the bag. Quilting the soft and stable isn't difficult, I used my walking foot to quilt straight lines. I chose Aurifil 50 weight thread in a bright green for the quilting, it really looks good on both sides! I used a size 14 topstitch needle (Schemtz Professional Chrome) for the entire bag, it was great through all the layers!
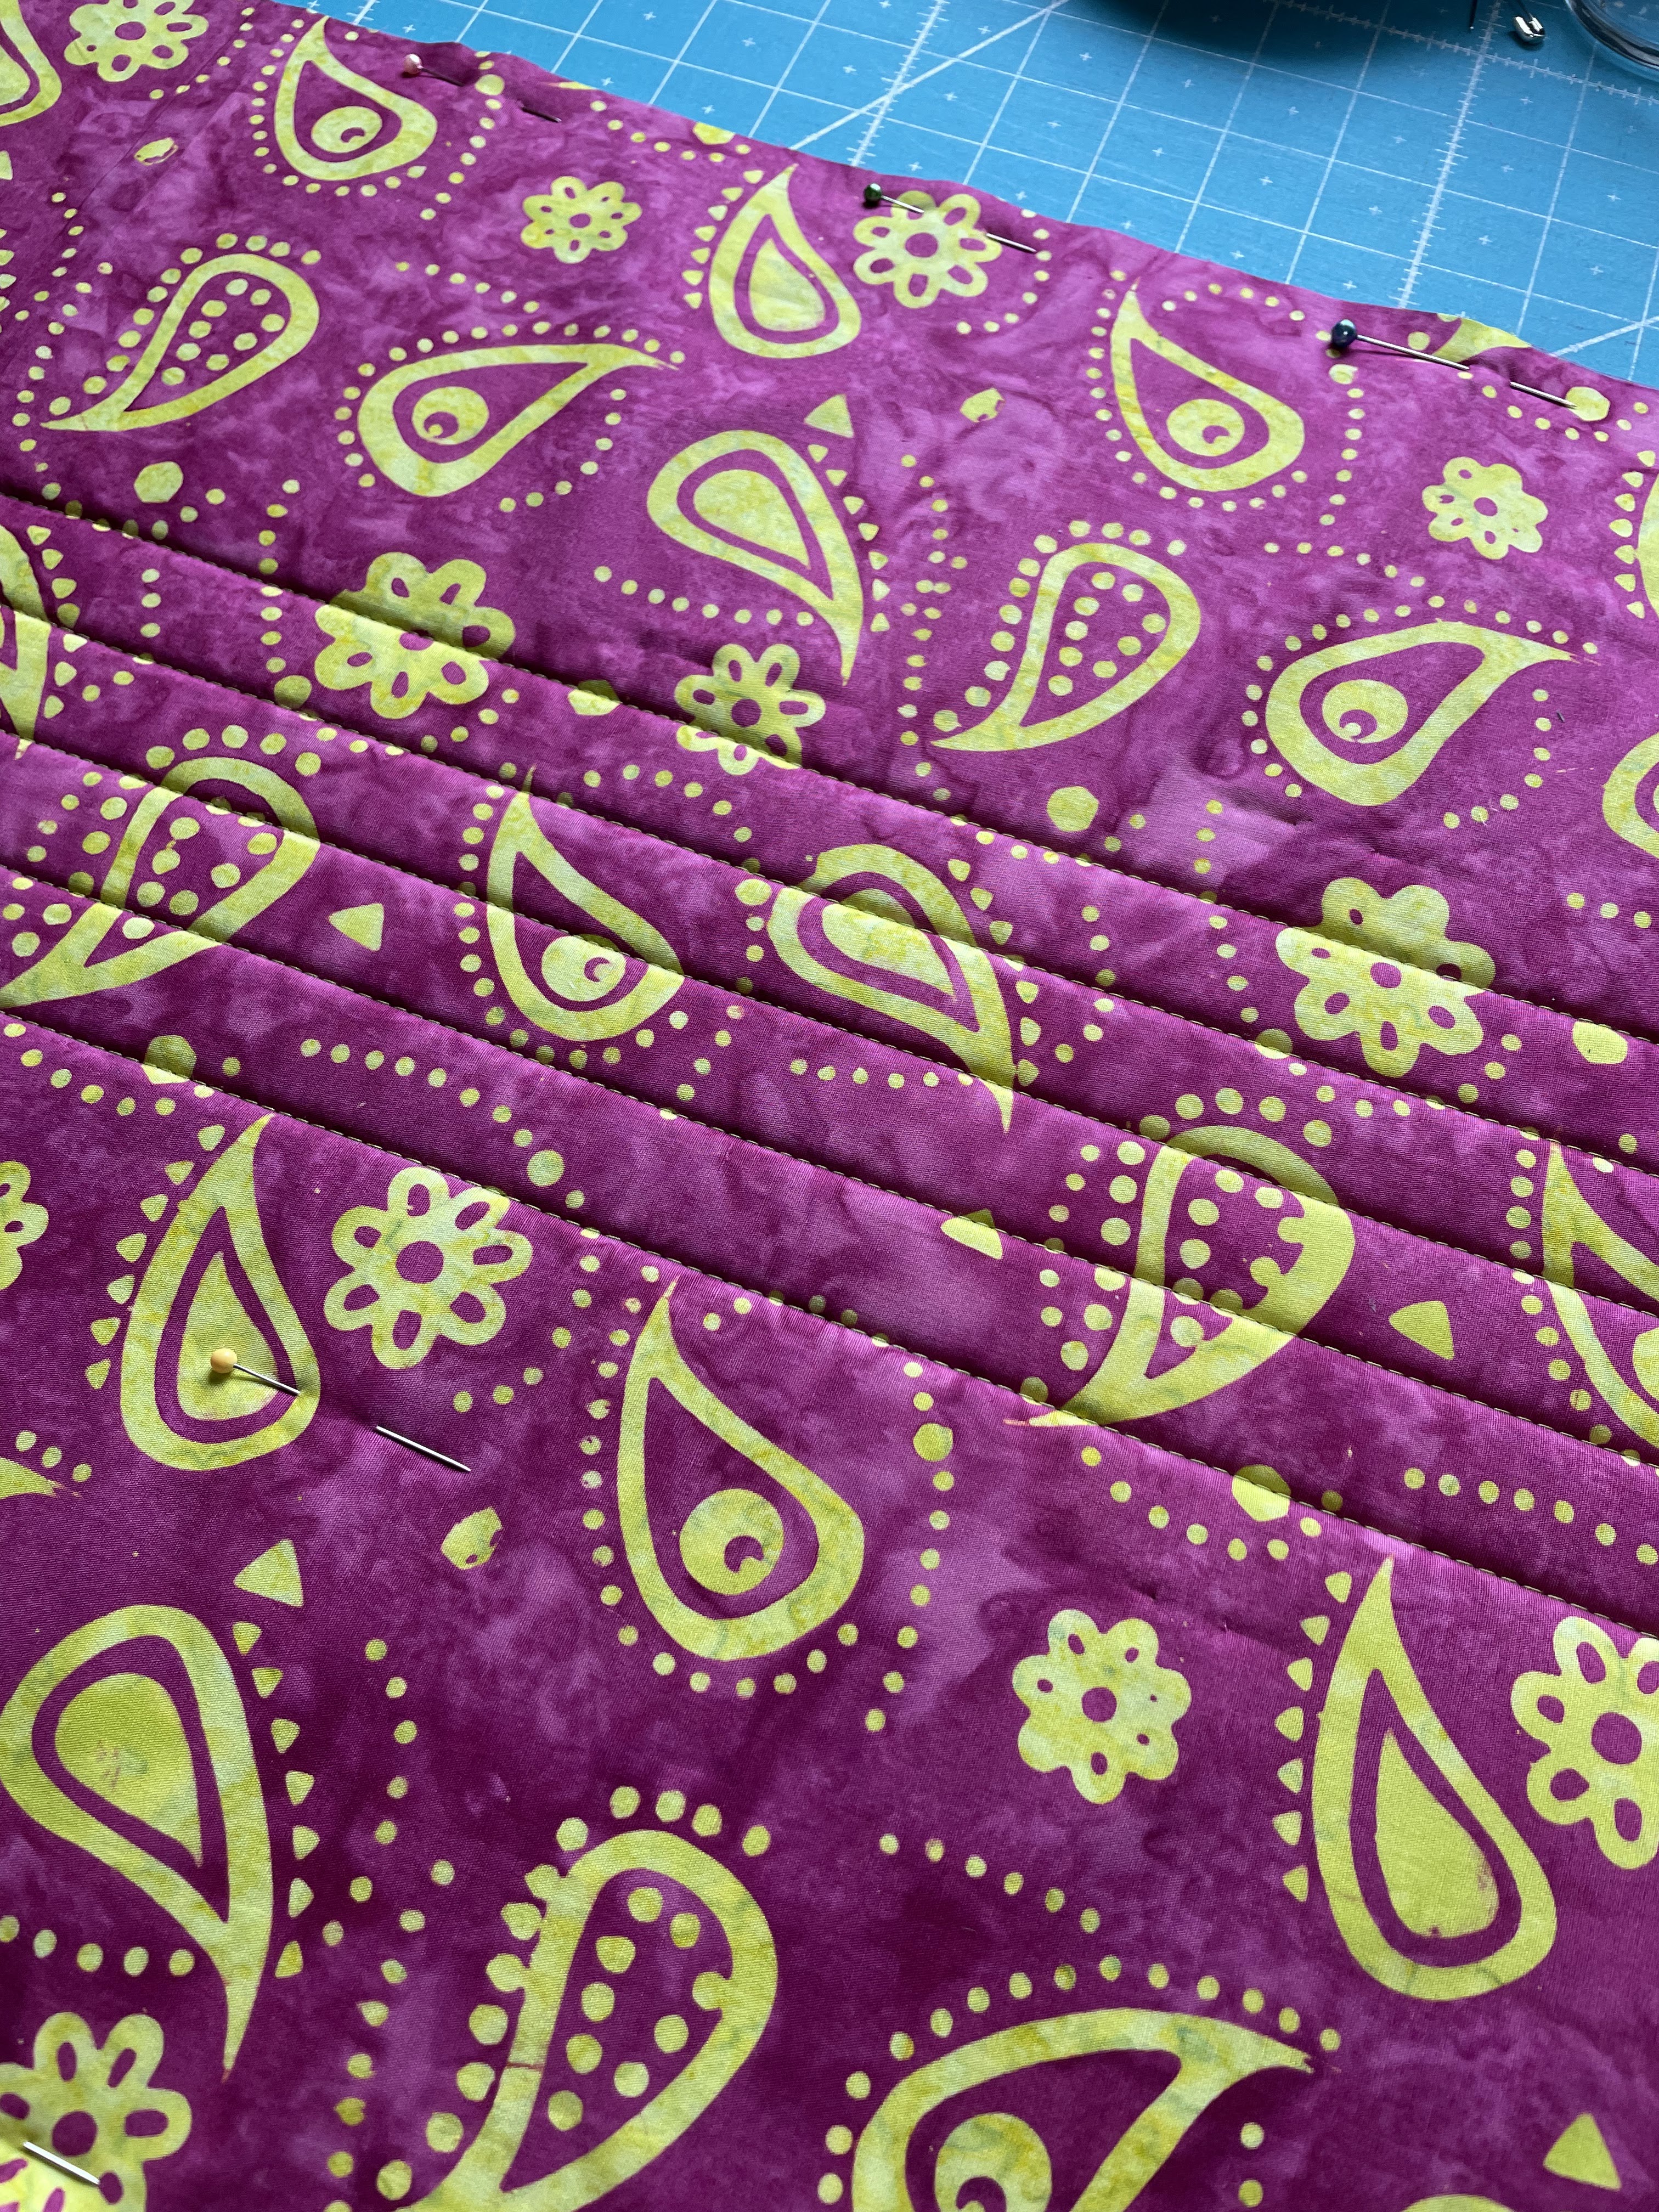
I love the definition you get in quilting the Soft and Stable! I used straight pins to baste because it was easy to pull them out as I went.

Here's a look at the back. Isn't this a pretty fabric, too?

After quilting the larger pieces the next step was sub-cutting the pieces for the bag and the interior pages that the pockets go on.

The next step was prepping the zippers - a lot of them! Thank goodness for the zippers by the yard, it made it easy to create zippers for the divided pockets with two sliders, as well as a long zipper for the outside of the bag.

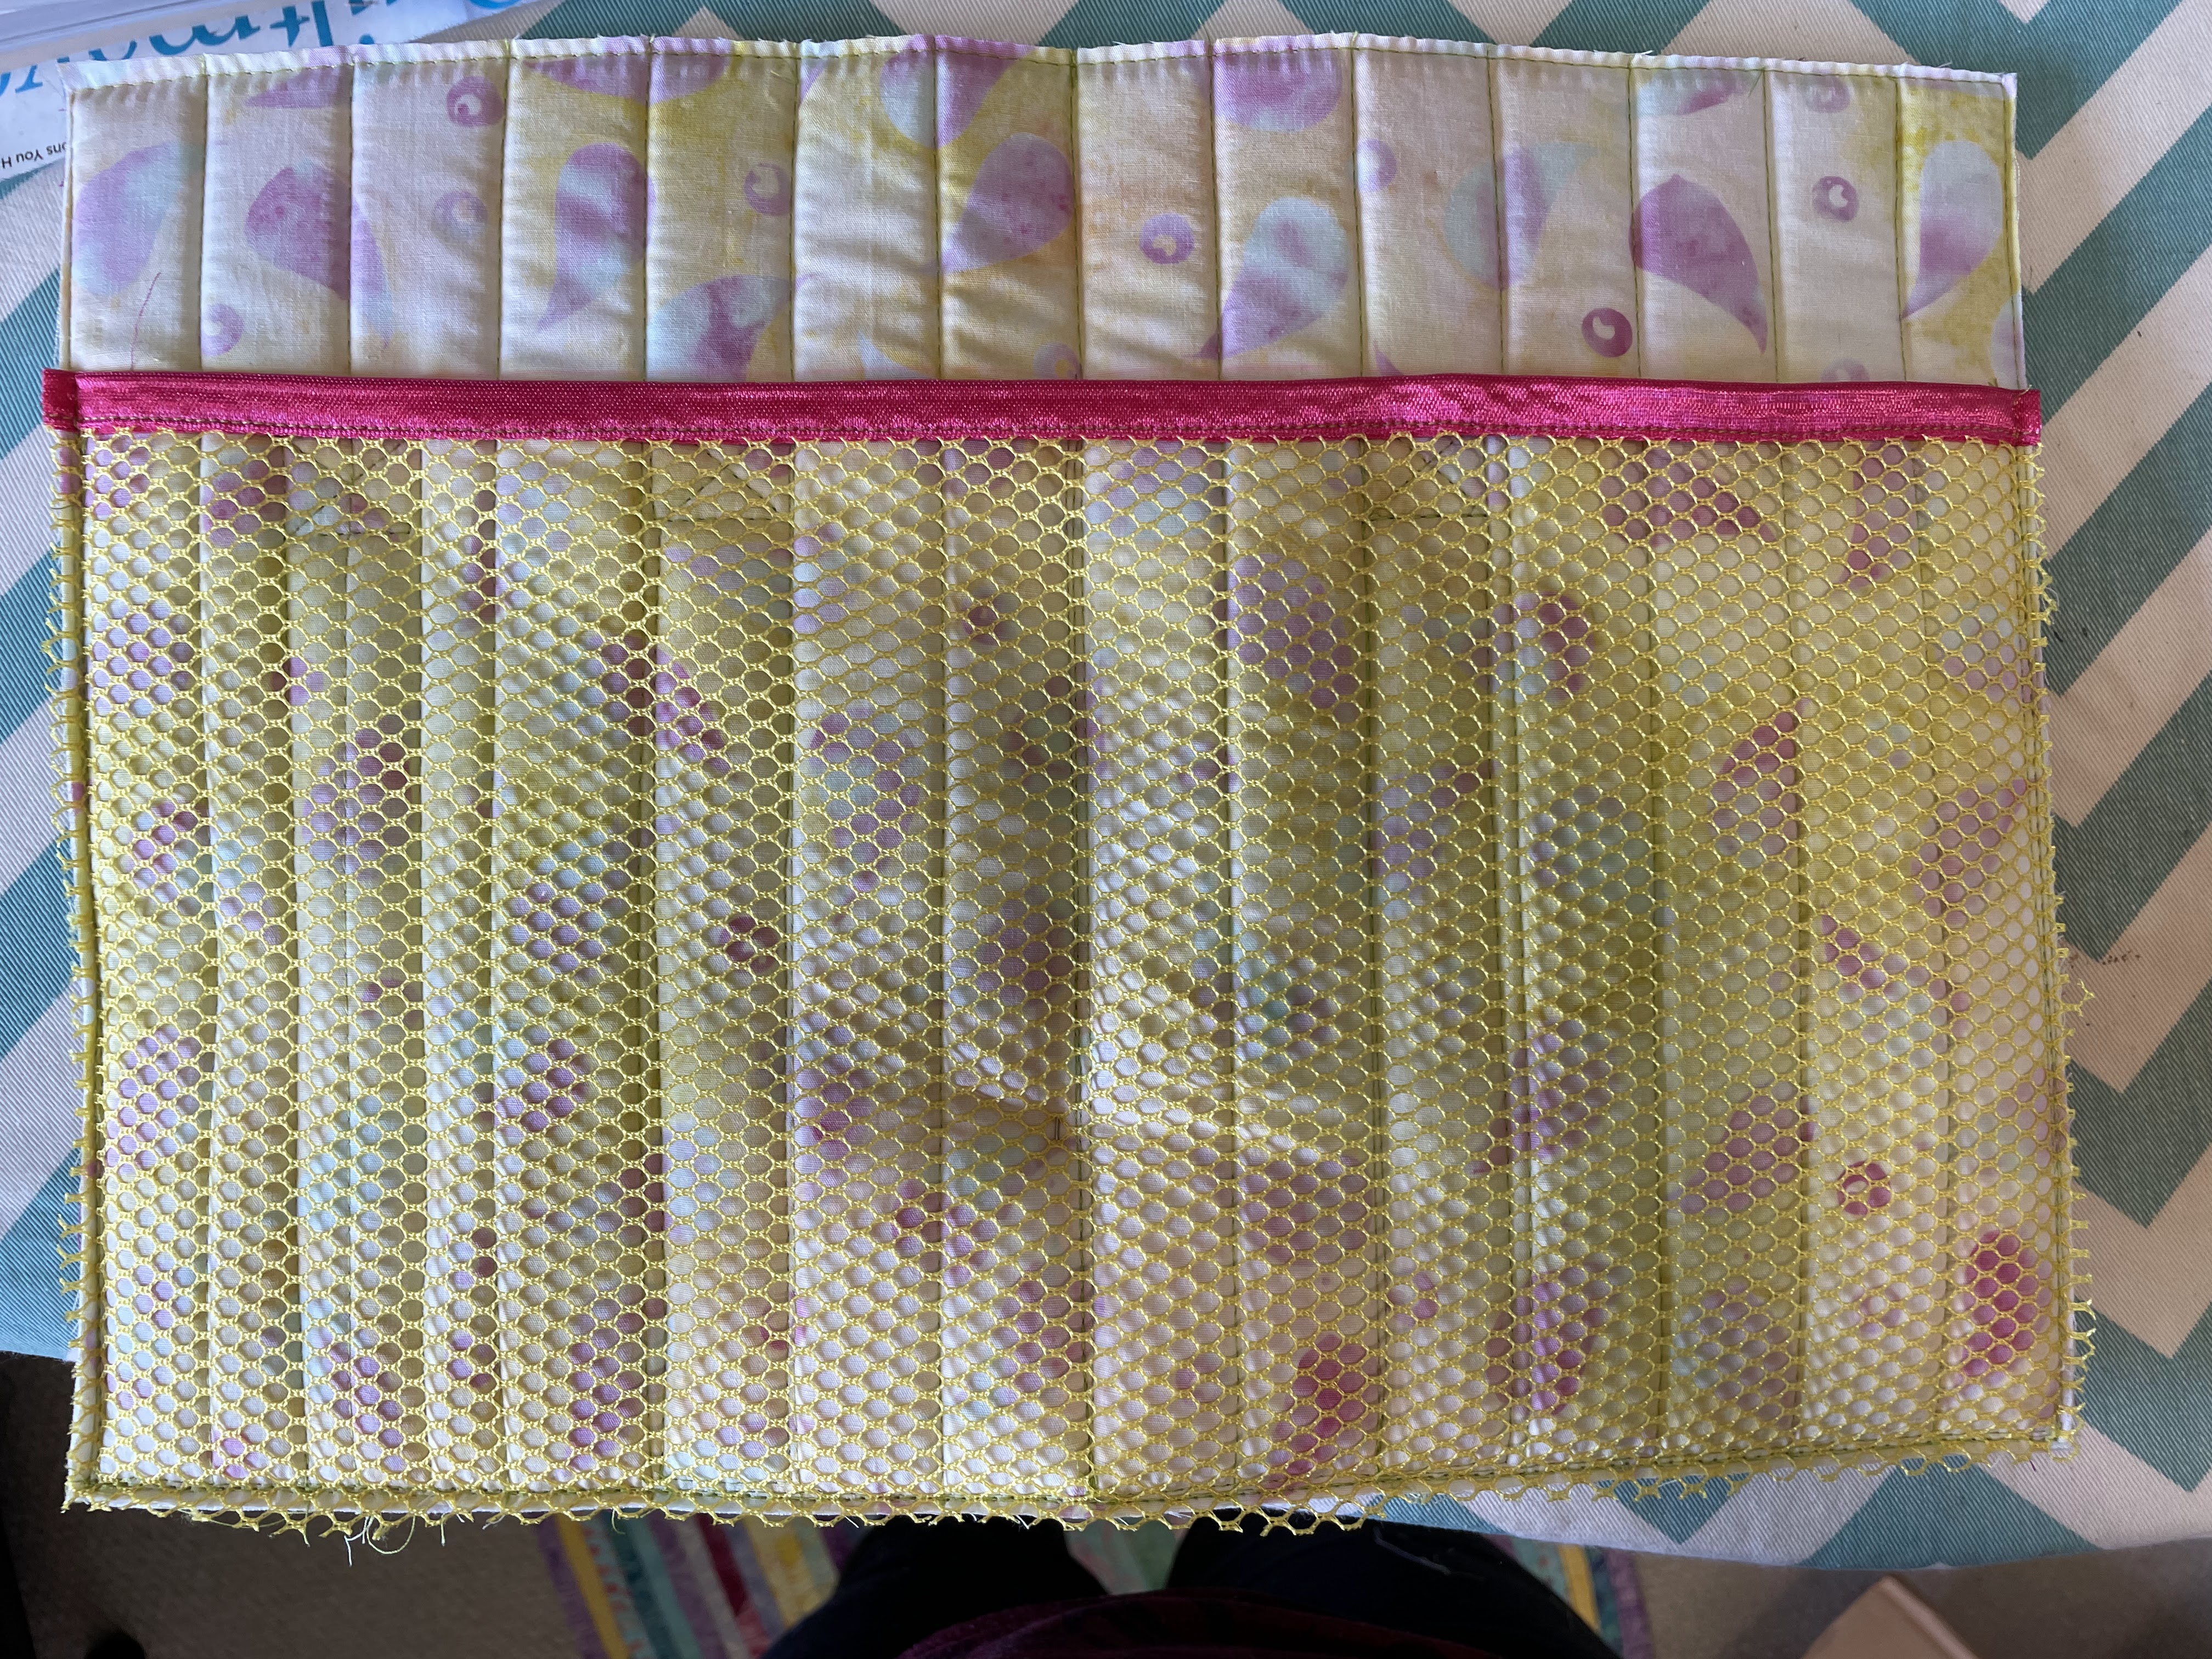
I was thankful for the good instructions on adding the zippers to both the vinyl as well as to the mesh. Each page has three small pockets on one side and a large pocket on the back, some of the small pockets have zippers and some have elastic binding. You get to decide how you want to make all the pockets, including dividing some of them to make smaller pockets. I pretty much stayed with the set up in the pattern.

The center of the page has a finishing strip, then you have to sew binding around the edge of the pages after you round the corners. After the pages are completed it's time to work on putting the bag together!

The straps are the next step, this bag has a detachable shoulder strap, plus carrying handles. Lots of tubes to sew, and you want to press the seams open so that they will look nice on the reverse side as well as on the front. A good tip I learned is to use a wooden dowel slipped into the tube for pressing! It works great!

After I topstitched the edges and added hardware, I was ready to work on the outside of the bag. This is the third fabric in my bag - a bright yellow/green that looks awesome with the bright raspberry pink!

Sewing the straps went well - that Schmetz topstitch needle did the trick - no skipped stitches on this one!

More zippers - this front pocket features a contrast trim and zipper pocket!

The inside of the bag also has a zippered pocket with the mesh.

The back of the bag has a slip pocket with a contrast binding.

And an inside mesh pocket with elastic binging.
Getting close to putting this all together! The front and the back look great! I pinned the handles out of the way and rounded the corners preparing to add the zipper strip and back to complete the bag.

The zipper and back make a long strip that needs to be sewn all the way around the front and back of the bag. This step can be a bit tricky - I use a lot of clips to hold everything together! I also changed to a pretty pink 40 weight Aurifil thread that came in my Ambassador box, it's a little stronger than the 50 weight so I thought it would be a good choice for this last step.

It takes patience and a lot of smushing of the edge strip, but it all comes together!

No - I didn't accidentally sew this together wrong, this bag is a bit different from the ones I've done before, the binding goes on the outside of this bag instead of the inside! I really like it because it gives the bag some extra pizzazz!

I really love seeing the bag at this stage - almost finished!

The binding is a little tricky, but taking it slow helps! I also like Annie's tip to not press the binding in half, it really helps to keep those corners smooth! I switched back to the lighter thread for this step.

The final step is adding the strap to hold the pages. It's a neat feature of this bag that you can remove the pages with the pockets!

Isn't it fun? The carry strap goes across the bag diagonnaly, making it nice for carrying over your shoulder!

I love how professional the results are! And how handy this bag is going to be! I went through my sewing room and found lots of things to add to the pockets. This bag is pretty much a portable sewing kit - I've got scissors, rotary cutter, and all kinds of goodies stored inside!

With such an amazing assortment of pockets, there are so many things you could carry with you! It's plenty deep enough to really fill up with all of your notions and supplies for a quilt retreat, or just to keep things organized in your sewing room!

If you want to make a great organizer for you sewing supplies, I can definitely recommend the A Place for Everything 2 bag!


6 comments:
I love seeing these bags. Yours is fabulous - but boy what a lot of zippers! One day I will tackle one of these larger bags with the many pockets. Congrats on a great bag!
Beautiful! And that wooden dowel trick sounds handy, I will try that!! I love your bag and hope you get lots of use out it!
Your bag came out smashingly beautiful! I love the fabrics you chose. Have a great day!
Love your bag! I'm thinking it would be a good one for an EPP project.
This is gorgeous! I love your fabric choices.
So pretty, Pamela! Love your fabric choices!
Post a Comment