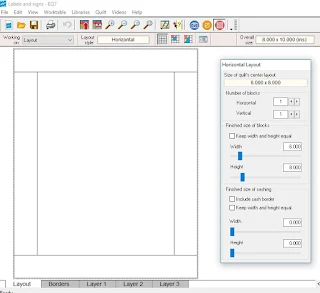
They are super easy to do! I start out by choosing a horizontal block layout and make the center one block:
I set my size to 6 blocks by 8 blocks because I want my finished sign to be 8 inches by 10 and I'll add a border of 1 inch all around.
Moving to the borders tab, I make sure my borders are 1 inch and select blocks as the border style. Then I select the appropriate number of blocks for the horizontal and vertical borders.
Next I go to Layer 1 and set blocks in my border. I rotated every other block to make a more interesting layout on this version. I colored my center the same color as the background of the block. You can spend a lot of time choosing and coloring your blocks, but I just did a fast version today!
Moving on to Layer 2, add text. After you select the set Applique Text button, use the shift key, and drag out a text box. You can choose your font, and text size and layout. These will all be consistent within the text box, buy you can create more than one text box if you want to have different sections of text. For instance, if I needed to credit the author of this saying I would add a small text box with the Author's name at the bottom of the saying.
Use the adjust tool to move your text box if needed, and change the color of the print with the select fabric tool. Again, lots of opportunity for creativity!
When you are finished, use the export image button to save your project as a jpeg that you can print later.
These make great quilt labels as well! You can make them whatever size you like - I like a more horizontal layout for a quilt label. I do them the same way, saving as a jpeg.
When I am ready to print, I use my photo program to print the size I want - I usually do four on a sheet of printable fabric at one time, depending on what labels I need. This way I can make the most use of my fabric sheets and not waste them! Cut out with a 1/4 inch seam allowance all the way around and hand applique to the back of your project.
If you would like a pdf copy of my printable project, you can download it by clicking on the image below:
 |
| Free Download! |
Don't forget to enter at the Electric Quilt Blog for this month's prize - Timeless Treasures is this month's prize partner and they will be giving away a copy of EQ7 there. Plus, use the #EQ25 on social media to be entered for additional prizes - only a couple more months to enter!


2 comments:
What a great idea! I've been looking for a better way to label quilts with more information, this might be it!
Great tutorial. I too enjoy these ease of using EQ7 for creating printables, labels, clipart and more. Very versatile software. And your printable is so inspirational. Total #CreativeGoodness
QuiltShopGal
www.quiltshopgal.com
Post a Comment